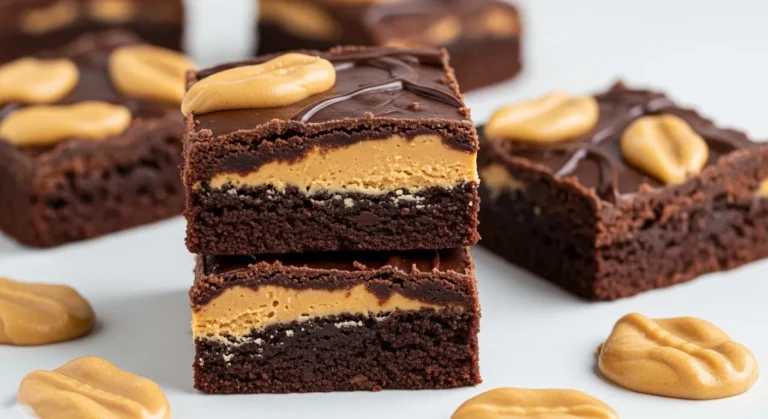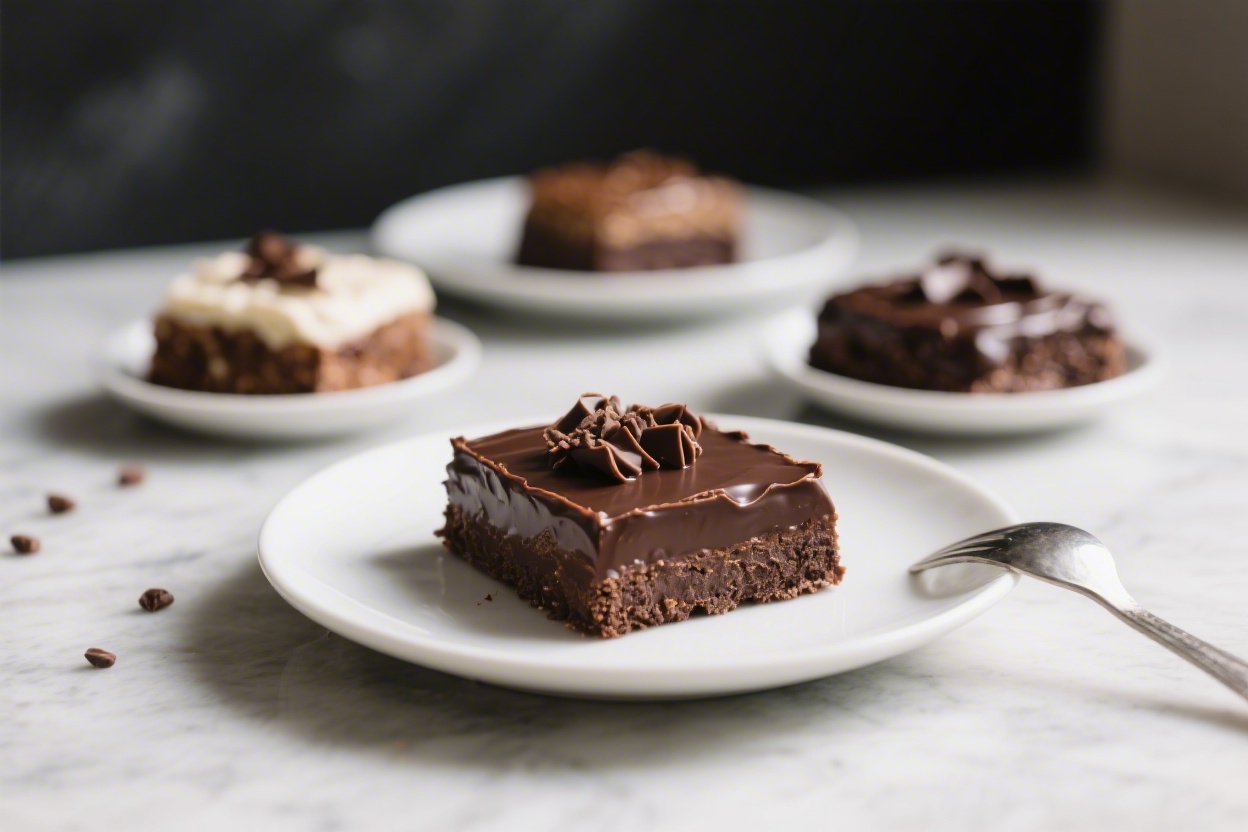
No Bake Chocolate Desserts – Easy, Creamy, and Crowd-Pleasing
No oven. No stress. Just rich, creamy chocolate treats you can whip up in minutes.
If you love the idea of dessert without the baking fuss, these no bake chocolate desserts will be your new go-to. They’re perfect for busy weeknights, hot summer days, or any time you want something sweet without heating up the kitchen. The best part?
You only need a few simple ingredients and a little chill time. Let’s make something delicious.
What Makes This Recipe So Good
- Quick and simple: Most of the work happens in one bowl. Melt, mix, chill, and you’re done.
- Foolproof texture: Silky-smooth and creamy thanks to pantry staples like chocolate, cream, and nut butter.
- Flexible flavors: Add coffee, vanilla, orange zest, or sea salt to make it your own.
- No special gear: A microwave or stovetop, a whisk, and a pan are all you need.
- Make-ahead friendly: These desserts set beautifully in the fridge and taste even better the next day.
Shopping List
- Chocolate: 12 ounces (340g) dark or semi-sweet chocolate chips or chopped bars
- Cocoa powder: Unsweetened, 1/4 cup, for extra depth (optional)
- Heavy cream or full-fat coconut milk: 1 cup
- Butter or coconut oil: 3 tablespoons, for shine and softness
- Nut butter: 1/2 cup (peanut, almond, or hazelnut) for body and flavor
- Maple syrup or honey: 1/4 cup, to sweeten
- Vanilla extract: 1 teaspoon
- Salt: A pinch, plus flaky sea salt for finishing (optional)
- Add-ins (optional): Crushed cookies, chopped nuts, mini marshmallows, shredded coconut, or dried fruit
Instructions
- Prep your pan: Line an 8×8-inch pan with parchment, leaving overhang on two sides for easy lifting.Lightly grease the parchment.
- Warm the cream: In a small pot or microwave-safe bowl, heat the cream until steaming but not boiling. If using coconut milk, shake the can well first.
- Melt the chocolate: Place chocolate and butter in a heatproof bowl. Pour the hot cream over the chocolate.Let sit 2 minutes, then whisk until smooth and glossy.
- Flavor and sweeten: Whisk in cocoa powder (if using), nut butter, maple syrup or honey, vanilla, and a pinch of salt. The mixture should be thick, shiny, and spreadable.
- Fold in extras: Stir in any add-ins like chopped nuts, crushed cookies, or coconut. Keep the ratio balanced so it sets well.
- Transfer and smooth: Scrape the mixture into the lined pan.Smooth the top with a spatula. Sprinkle with flaky sea salt if you like.
- Chill: Refrigerate for 2–3 hours, or until firm enough to slice. For faster set, pop it in the freezer for 45–60 minutes, then move to the fridge.
- Slice and serve: Lift from the pan with the parchment.Use a warm knife (run under hot water and wipe dry) to cut clean squares or bars.

Keeping It Fresh
- Fridge: Store in an airtight container for 1 week. Layer with parchment to prevent sticking.
- Freezer: Freeze up to 2 months. Thaw in the fridge 30–45 minutes before serving for the best texture.
- Serving tip: These taste best slightly cool but not rock hard.Let sit at room temperature for 5–10 minutes before enjoying.
Why This is Good for You
- Dark chocolate perks: Dark chocolate contains antioxidants and can offer a small mood boost. Aim for 60–70% cacao or higher.
- Healthy fats: Nut butter adds protein and healthy fats that help with satiety.
- Less refined sugar: Using maple syrup or honey keeps the sweetness gentle and easy to adjust.
- Portion-friendly: Rich flavor means smaller pieces satisfy, so it’s easier to keep portions in check.
Common Mistakes to Avoid
- Overheating the chocolate: Scorched chocolate turns grainy. Keep the cream hot, not boiling, and let it melt the chocolate gently.
- Skipping the salt: A tiny pinch makes the chocolate taste fuller and more balanced.Don’t omit it.
- Too many mix-ins: Overloading with nuts or cookies can prevent a clean set. Keep add-ins to about 1 to 1 1/2 cups total.
- Impatience with chilling: Cutting too soon leads to messy slices. Wait until fully set for neat squares.
- Wrong pan size: A much larger pan makes thin, fragile bars.Stick to 8×8 inches or adjust quantities.
Alternatives
- Dairy-free: Use full-fat coconut milk and coconut oil instead of cream and butter. Choose dairy-free chocolate.
- No nuts: Swap nut butter for sunflower seed butter or tahini. Skip nut add-ins.
- Extra-firm set: Add 1–2 tablespoons of coconut oil for a firmer chill, or reduce sweetener slightly.
- Mocha version: Stir in 1–2 teaspoons of instant espresso powder with the cocoa.
- Orange-chocolate: Add 1 teaspoon orange zest and a few drops of orange extract.
- Cookie-crunch: Fold in crushed chocolate wafer cookies or graham crackers for texture.
- Truffle bites: Chill the mixture until scoopable, roll into balls, and dust with cocoa or dip in melted chocolate.
FAQ’s
Can I use milk chocolate instead of dark?
Yes, but reduce the sweetener by half because milk chocolate is already sweeter.
You may also want to add a pinch more salt to balance the flavor.
How do I fix a grainy or split mixture?
Whisk in a tablespoon or two of warm cream, a little at a time, until it comes back together. Gentle heat and steady whisking usually smooths it out.
What if I don’t have nut butter?
Use extra chocolate (about 4 more ounces) and increase the butter or coconut oil by 1 tablespoon to maintain structure. Sunflower seed butter or tahini also work well.
How long does it take to set?
In the fridge, expect 2–3 hours.
In the freezer, 45–60 minutes, then move to the fridge so it doesn’t get icy.
Can I make this ahead for a party?
Absolutely. Make it 1–2 days ahead, keep it chilled, and slice just before serving. It holds its shape well on a dessert platter.
Do I need to temper chocolate?
No.
Since this is a chilled dessert, tempering isn’t necessary. The texture stays smooth and fudgy without it.
What’s the best way to get clean slices?
Use a sharp knife warmed under hot water and wiped dry. Cut straight down in one motion, cleaning the blade between cuts.
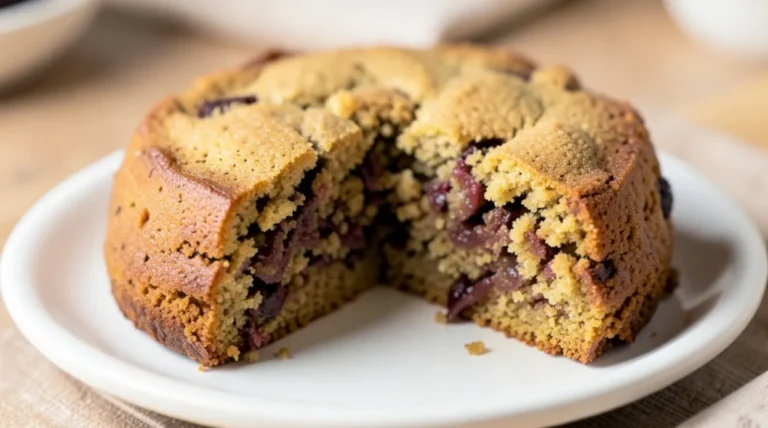
Related Recipes
- No Bake Chocolate Peanut Butter Cheesecake
- No Bake Eclair Cake – Simple, Creamy, Crowd
- No Bake Mini Cheesecakes – Creamy, Cute, and Effortless
Final Thoughts
No bake chocolate desserts are the sweet spot between simple and special.
With a handful of ingredients and a little chill time, you get rich, glossy squares that feel like a treat from a fancy shop. Keep the base recipe on repeat, switch up the flavors, and let your pantry guide you. Whether it’s a weeknight treat or an easy party dessert, this one never disappoints.
No Bake Chocolate Desserts - Easy, Creamy, and Crowd-Pleasing
Ingredients
- Chocolate: 12 ounces (340g) dark or semi-sweet chocolate chips or chopped bars
- Cocoa powder: Unsweetened, 1/4 cup, for extra depth (optional)
- Heavy cream or full-fat coconut milk: 1 cup
- Butter or coconut oil: 3 tablespoons, for shine and softness
- Nut butter: 1/2 cup (peanut, almond, or hazelnut) for body and flavor
- Maple syrup or honey: 1/4 cup, to sweeten
- Vanilla extract: 1 teaspoon
- Salt: A pinch, plus flaky sea salt for finishing (optional)
- Add-ins (optional): Crushed cookies, chopped nuts, mini marshmallows, shredded coconut, or dried fruit
Instructions
- Prep your pan: Line an 8x8-inch pan with parchment, leaving overhang on two sides for easy lifting. Lightly grease the parchment.
- Warm the cream: In a small pot or microwave-safe bowl, heat the cream until steaming but not boiling. If using coconut milk, shake the can well first.
- Melt the chocolate: Place chocolate and butter in a heatproof bowl. Pour the hot cream over the chocolate. Let sit 2 minutes, then whisk until smooth and glossy.
- Flavor and sweeten: Whisk in cocoa powder (if using), nut butter, maple syrup or honey, vanilla, and a pinch of salt. The mixture should be thick, shiny, and spreadable.
- Fold in extras: Stir in any add-ins like chopped nuts, crushed cookies, or coconut. Keep the ratio balanced so it sets well.
- Transfer and smooth: Scrape the mixture into the lined pan. Smooth the top with a spatula. Sprinkle with flaky sea salt if you like.
- Chill: Refrigerate for 2–3 hours, or until firm enough to slice. For faster set, pop it in the freezer for 45–60 minutes, then move to the fridge.
- Slice and serve: Lift from the pan with the parchment. Use a warm knife (run under hot water and wipe dry) to cut clean squares or bars.
Printable Recipe Card
Want just the essential recipe details without scrolling through the article? Get our printable recipe card with just the ingredients and instructions.