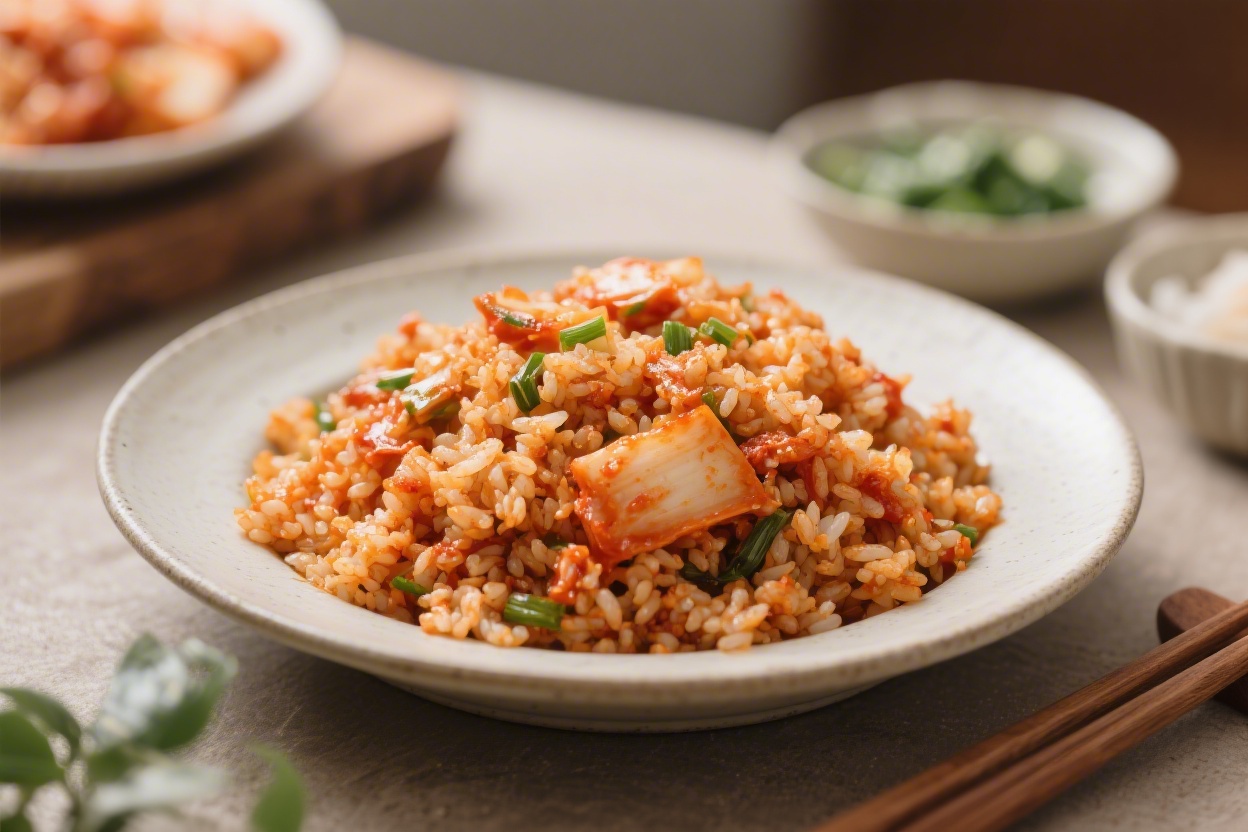
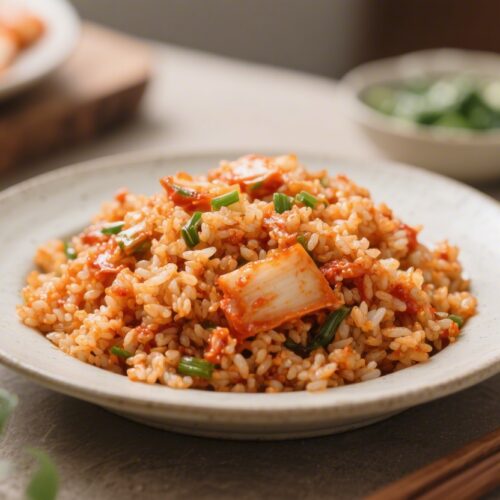
Quick Kimchi Fried Rice (Kimchi Bokkeumbap) at Home – Fast, Flavorful, and Satisfying
Kimchi fried rice is the weeknight hero you want in your back pocket. It’s bold, comforting, and ready in minutes with a short list of pantry staples. If you’ve got leftover rice and a jar of kimchi, you’re halfway there.
This version is quick, flexible, and easy to adjust for your spice level. Top it with a runny egg, and you’ve got a complete meal that hits all the right notes.
What Makes This Recipe So Good
- Fast and fuss-free: From fridge to table in about 15 minutes.
- Big flavor payoff: Kimchi brings tang, heat, and umami without a long ingredient list.
- Perfect for leftovers: Cold, day-old rice fries up beautifully for the best texture.
- Customizable: Add spam, bacon, tofu, or mushrooms—use what you have.
- Budget-friendly: Pantry staples plus one star ingredient: kimchi.
Shopping List
- Cooked white rice, preferably day-old (2 to 3 cups)
- Kimchi, chopped (1 to 1.5 cups), plus 2 to 3 tablespoons kimchi juice
- Cooking oil (neutral or sesame oil)
- Garlic (2 cloves), minced
- Scallions (2 to 3), sliced, whites and greens separated
- Soy sauce (1 to 2 teaspoons), to taste
- Gochujang or Gochugaru (optional, for extra heat)
- Butter (optional, 1 tablespoon for richness)
- Protein of choice (optional): spam, bacon, ham, tofu, or mushrooms (1/2 to 1 cup, diced)
- Eggs (1 per serving), fried or sunny-side up
- Sesame oil (a small drizzle to finish)
- Toasted sesame seeds (optional)
- Nori (optional), cut into thin strips for garnish
How to Make It
- Prep the rice: Break up cold, cooked rice with a fork so there are no large clumps. This helps it fry evenly.
- Chop the kimchi: Slice it into small pieces.Reserve a few spoonfuls of kimchi juice—this adds flavor and color.
- Heat the pan: Place a large skillet or wok over medium-high heat. Add 1 to 2 teaspoons of oil. If using bacon or spam, cook it first until browned and crisp.Remove excess fat if needed, leaving about a tablespoon in the pan.
- Sauté aromatics: Add the scallion whites and garlic. Stir-fry for 20 to 30 seconds until fragrant, but not burned.
- Add kimchi: Toss in the chopped kimchi. Stir-fry for 2 to 3 minutes to slightly caramelize it.This deepens the flavor.
- Season the base: Stir in 1 teaspoon soy sauce and a small squeeze of gochujang or pinch of gochugaru if you like more heat. Add the kimchi juice.
- Fry the rice: Add the rice. Spread it out and let it sit for 30 seconds to get some crispy bits.Then stir-fry, breaking up clumps and mixing well so the rice turns evenly red-orange.
- Finish with richness: Stir in 1 tablespoon butter (optional but highly recommended). Add the scallion greens. Taste and adjust with more soy sauce or a tiny pinch of sugar if the kimchi is very sour.
- Cook the eggs: In a separate small pan, fry eggs to your liking.Sunny-side up with a runny yolk is classic.
- Serve: Plate the rice, top with an egg, drizzle with a little sesame oil, and sprinkle sesame seeds and nori if using.
Storage Instructions
- Refrigerate: Store leftovers in an airtight container for up to 3 days.
- Reheat: Warm in a skillet over medium heat with a splash of water or oil. Stir often to prevent sticking.
- Freeze: You can freeze portions for up to 1 month. Thaw in the fridge overnight before reheating for best texture.
Why This is Good for You
- Probiotic potential: Kimchi is a fermented food that can support gut health.Cooking reduces some live cultures, but the nutrients and fiber remain.
- Balanced macros: Carbs from rice, protein from eggs or add-ins, and healthy fats from sesame oil or butter make this a satisfying meal.
- Veggie boost: Kimchi brings cabbage, garlic, and chili, plus antioxidants and vitamins A and C.
What Not to Do
- Don’t use freshly cooked, steamy rice unless you dry it. Hot rice turns mushy and clumps.
- Don’t skip caramelizing the kimchi. A quick sauté unlocks deeper flavor and sweetness.
- Don’t drown it in soy sauce. Start small. The kimchi is already salty and punchy.
- Don’t overcrowd the pan. Too much rice at once steams instead of fries.Cook in batches if needed.
Alternatives
- Rice swaps: Use day-old brown rice, short-grain white rice, or even cauliflower rice for a lighter version.
- Protein swaps: Try ground pork, rotisserie chicken, tempeh, or edamame. Crisp tofu cubes work great.
- Flavor twists: Add a dab of doenjang (Korean soybean paste) for extra umami, or a splash of rice vinegar if your kimchi is mild.
- Add veggies: Peas, corn, carrots, or spinach all stir-fry well and add color and texture.
- No butter? Finish with a bit more sesame oil for richness.
FAQ
Can I make this with fresh rice?
Yes, but spread the hot rice on a tray to steam off moisture for 10 to 15 minutes, or refrigerate it uncovered for 20 to 30 minutes. Drier rice fries better and won’t get gummy.
How do I control the spice level?
Choose a milder kimchi and skip gochujang or gochugaru.
If you want more heat, add a little at a time and taste as you go. A pinch of sugar can balance extra spice or sourness.
What kind of kimchi works best?
Napa cabbage kimchi is classic. Older, well-fermented kimchi has stronger flavor and is great for cooking.
Fresher kimchi is milder and sweeter—also delicious, just different.
Do I have to add an egg?
No, but it rounds out the dish. A runny yolk adds a creamy sauce-like texture. For a vegan version, skip the egg and use crispy tofu and a drizzle of toasted sesame oil.
Can I make it gluten-free?
Yes.
Use gluten-free soy sauce or tamari, and check that your kimchi and gochujang are gluten-free. Many brands are, but labels vary.
Why add butter to a Korean dish?
Butter isn’t traditional, but it’s a popular modern twist. A small knob softens the kimchi’s acidity and adds a rich, restaurant-style finish.
How do I get crispy bits in the rice?
Use high heat, don’t overcrowd the pan, and let the rice sit undisturbed for short intervals before stirring.
A wide pan or wok helps maximize contact with the heat.
Wrapping Up
Kimchi fried rice is the definition of low effort, high reward. With a jar of kimchi and leftover rice, you can cook a bold, comforting meal in minutes. Keep it simple or dress it up—either way, it’s satisfying, customizable, and hard to mess up.
Top with a sunny egg, grab a spoon, and enjoy.
Quick Kimchi Fried Rice (Kimchi Bokkeumbap) at Home - Fast, Flavorful, and Satisfying
Ingredients
- Cooked white rice, preferably day-old (2 to 3 cups)
- Kimchi, chopped (1 to 1.5 cups), plus 2 to 3 tablespoons kimchi juice
- Cooking oil (neutral or sesame oil)
- Garlic (2 cloves), minced
- Scallions (2 to 3), sliced, whites and greens separated
- Soy sauce (1 to 2 teaspoons), to taste
- Gochujang or Gochugaru (optional, for extra heat)
- Butter (optional, 1 tablespoon for richness)
- Protein of choice (optional): spam, bacon, ham, tofu, or mushrooms (1/2 to 1 cup, diced)
- Eggs (1 per serving), fried or sunny-side up
- Sesame oil (a small drizzle to finish)
- Toasted sesame seeds (optional)
- Nori (optional), cut into thin strips for garnish
Instructions
- Prep the rice: Break up cold, cooked rice with a fork so there are no large clumps. This helps it fry evenly.
- Chop the kimchi: Slice it into small pieces. Reserve a few spoonfuls of kimchi juice—this adds flavor and color.
- Heat the pan: Place a large skillet or wok over medium-high heat. Add 1 to 2 teaspoons of oil. If using bacon or spam, cook it first until browned and crisp. Remove excess fat if needed, leaving about a tablespoon in the pan.
- Sauté aromatics: Add the scallion whites and garlic. Stir-fry for 20 to 30 seconds until fragrant, but not burned.
- Add kimchi: Toss in the chopped kimchi. Stir-fry for 2 to 3 minutes to slightly caramelize it. This deepens the flavor.
- Season the base: Stir in 1 teaspoon soy sauce and a small squeeze of gochujang or pinch of gochugaru if you like more heat. Add the kimchi juice.
- Fry the rice: Add the rice. Spread it out and let it sit for 30 seconds to get some crispy bits. Then stir-fry, breaking up clumps and mixing well so the rice turns evenly red-orange.
- Finish with richness: Stir in 1 tablespoon butter (optional but highly recommended). Add the scallion greens. Taste and adjust with more soy sauce or a tiny pinch of sugar if the kimchi is very sour.
- Cook the eggs: In a separate small pan, fry eggs to your liking. Sunny-side up with a runny yolk is classic.
- Serve: Plate the rice, top with an egg, drizzle with a little sesame oil, and sprinkle sesame seeds and nori if using.
Printable Recipe Card
Want just the essential recipe details without scrolling through the article? Get our printable recipe card with just the ingredients and instructions.