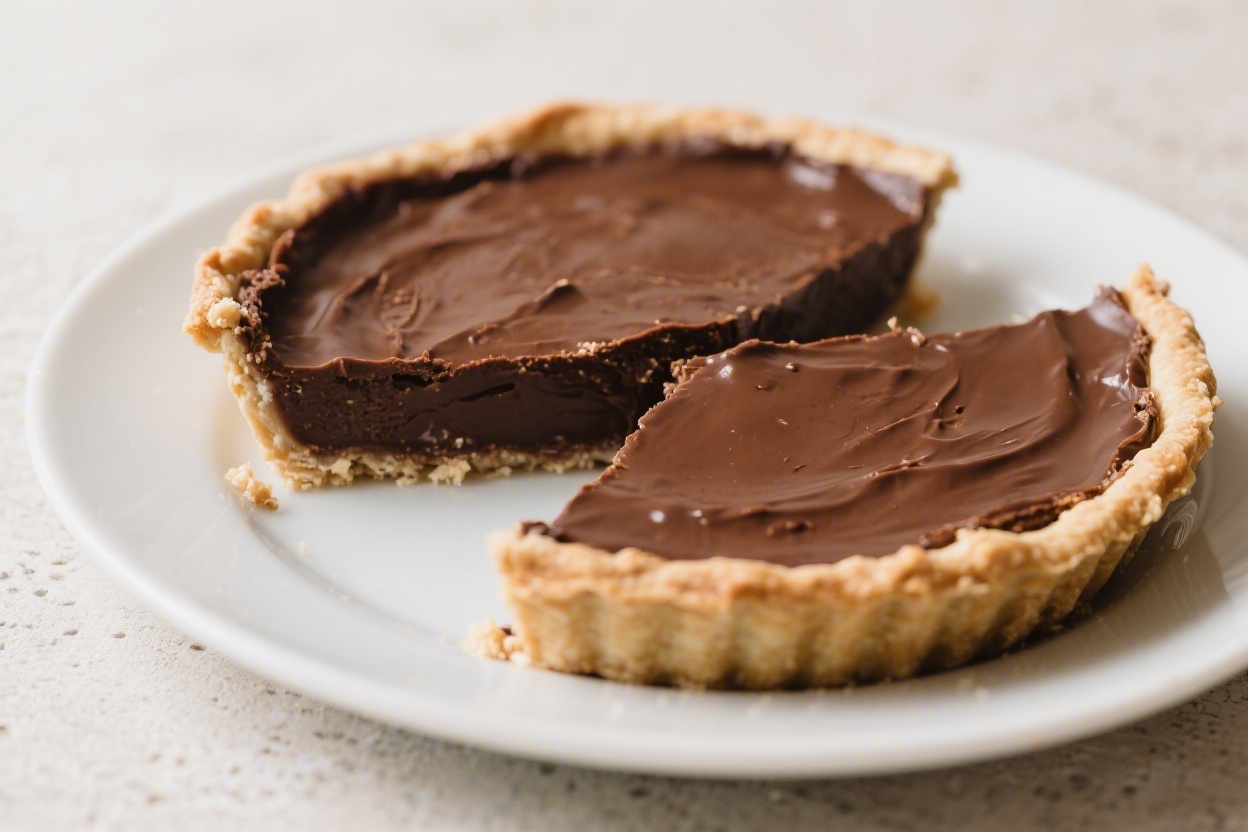
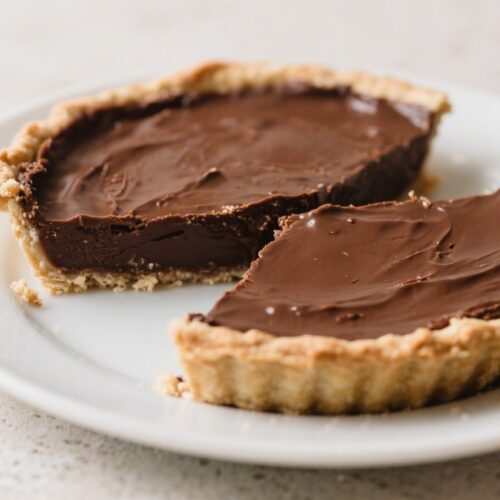
Old Fashioned Chocolate Pie – A Silky, Comforting Classic
There’s something timeless about a chocolate pie made the old-fashioned way. No shortcuts, just simple ingredients and a slow-cooked custard that sets up silky-smooth. It’s the kind of dessert that reminds you of Sunday suppers and handwritten recipe cards tucked in a drawer.
The crust is crisp, the filling is rich and not too sweet, and the top gets a cloud of whipped cream. If you’ve never made a custard pie before, don’t worry—this one is friendly, forgiving, and so worth it.
What Makes This Recipe So Good
- Silky, stovetop custard: The filling cooks gently on the stove, so you’re in control of the texture—no curdling, no guesswork.
- Balanced chocolate flavor: A mix of cocoa powder and chopped chocolate gives a deep, rounded taste without being heavy.
- Everyday ingredients: Milk, eggs, sugar, and butter—things you likely already have—create a pie that tastes special.
- Great make-ahead dessert: The pie needs time to chill, which makes it ideal for gatherings. It slices cleanly and holds up well.
- Classic, cozy vibe: It’s nostalgic and homey, but still elegant enough for holidays and dinner parties.
What You’ll Need
- 1 fully baked 9-inch pie crust (homemade or store-bought), cooled
- 1 cup granulated sugar
- 1/3 cup unsweetened cocoa powder (natural or Dutch-process)
- 1/4 cup cornstarch (or 1/3 cup all-purpose flour as a substitute)
- 1/4 teaspoon fine salt
- 3 large egg yolks, room temperature
- 2 3/4 cups whole milk (2% works, but whole gives the creamiest texture)
- 3 ounces semisweet or dark chocolate, finely chopped
- 2 tablespoons unsalted butter
- 1 1/2 teaspoons vanilla extract
- Lightly sweetened whipped cream, for topping
- Chocolate shavings or cocoa powder, optional garnish

How to Make It
- Blind bake the crust: If you haven’t already, bake your pie crust until golden and fully set.Let it cool completely so the filling doesn’t steam it soggy.
- Whisk the dry ingredients: In a medium saucepan off the heat, whisk together sugar, cocoa powder, cornstarch, and salt until no cocoa lumps remain.
- Temper with milk: Gradually whisk in about 1/2 cup milk to make a smooth paste. Then slowly add the rest of the milk, whisking constantly so it’s lump-free.
- Cook the custard base: Set the pan over medium heat. Cook, whisking steadily, until the mixture warms and starts to thicken, 5–8 minutes.Don’t rush it; gentle heat prevents scorching.
- Temper the yolks: In a small bowl, whisk the egg yolks. Ladle in a splash of the hot mixture while whisking the yolks, then another splash. Pour the warmed yolks back into the pan, whisking all the while.
- Thicken to pudding stage: Continue cooking over medium heat, whisking, until the custard is glossy and thick enough to coat the back of a spoon, 2–4 minutes.Small bubbles will plop up; that’s your cue it’s ready.
- Add chocolate and butter: Remove from heat. Immediately add the chopped chocolate, butter, and vanilla. Whisk until completely smooth and shiny.
- Strain for silkiness: For the smoothest texture, pour the custard through a fine-mesh sieve into a bowl.This catches any tiny lumps or bits of cooked egg.
- Fill the crust: Scrape the warm filling into the cooled crust. Smooth the top with a spatula so it sets evenly.
- Prevent a skin: Press a piece of plastic wrap directly onto the surface of the filling. This keeps the top from forming a rubbery layer.
- Chill until set: Refrigerate at least 4 hours, or overnight for the cleanest slices.
- Finish and serve: Peel off the plastic.Top with soft peaks of whipped cream and a dusting of cocoa or chocolate shavings. Slice with a warm, clean knife for neat wedges.
Keeping It Fresh
- Refrigerate: Keep the pie covered in the fridge for up to 3 days. Add the whipped cream just before serving if you can.
- No freezing: Custard pies tend to weep and turn grainy after freezing.It’s best enjoyed fresh from the fridge.
- Store slices smartly: Press plastic wrap against the cut edges to prevent drying, and keep in an airtight container to avoid fridge odors.
Why This is Good for You
- Mindful indulgence: This pie is rich, so a small slice truly satisfies. It encourages portion awareness while still feeling special.
- Real ingredients: Milk, eggs, and cocoa bring protein, minerals, and antioxidants. No artificial flavors needed.
- Comfort factor: A familiar dessert can be a mood booster, and sharing it with people you love makes it even better.
Common Mistakes to Avoid
- Overheating the custard: High heat can make it grainy.Keep it at medium and whisk constantly.
- Skipping the tempering step: Adding yolks directly to hot liquid can scramble them. Warm them gradually with a little hot mixture first.
- Not straining: It’s a small step that makes a big difference in texture. Strain for that bakery-smooth finish.
- Filling a warm crust: Heat creates steam and sogginess.Let the crust cool fully before adding the custard.
- Cutting too soon: The pie needs several hours to set. Rushing it leads to runny slices.
Recipe Variations
- Chocolate wafer crust: Swap the pastry crust for a chocolate cookie crumb crust with a pinch of salt. Bake 8–10 minutes, cool, and fill.
- Mocha twist: Add 1–2 teaspoons instant espresso powder with the dry ingredients to deepen the chocolate and add a subtle coffee note.
- Salted chocolate: Stir in 1/4 teaspoon flaky sea salt with the vanilla, and finish slices with a light sprinkle on top.
- Meringue topping: Skip whipped cream and top with a cooked meringue instead, then torch or bake briefly to brown.
- Dairy-light version: Use 2% milk and reduce butter to 1 tablespoon.The texture will be slightly lighter but still lush.
- Extra-dark: Use Dutch-process cocoa and 70% chocolate for a bolder, less sweet profile.
FAQ’s
Can I use cocoa powder only and skip the chopped chocolate?
Yes. Increase cocoa powder to 1/2 cup and add an extra tablespoon of butter for body. The flavor will be a bit drier and less rounded, but still delicious.
What if I don’t have cornstarch?
Use 1/3 cup all-purpose flour instead.
It thickens well, though the texture will be slightly less glossy and a touch more opaque.
Why did my custard turn lumpy?
It likely overheated or wasn’t whisked evenly. Strain it right away to smooth out the texture. Next time, lower the heat and keep the whisk moving.
Can I make it a day ahead?
Absolutely.
In fact, it slices best after an overnight chill. Add the whipped cream right before serving for the freshest look.
How do I keep the crust crisp?
Bake the crust fully, cool it completely, and consider brushing the inside with a thin layer of melted chocolate before filling. It creates a barrier that helps prevent sogginess.
What’s the best chocolate to use?
Choose a good-quality semisweet or dark bar (55%–70%).
Chopped bars melt smoother than most chips and give better flavor.
Can I make it gluten-free?
Yes. Stick with cornstarch as the thickener and use a gluten-free pie crust. Check that your chocolate and cocoa are certified gluten-free.
How do I know when the custard is thick enough?
It should coat the back of a spoon and leave a clean line when you swipe a finger through it.
A few gentle bubbles mean the starch has activated.
Related Recipes
- No Bake Oreo Truffles – Creamy, Chocolatey, and So Easy
- Old Fashioned Chocolate Pie – A Silky, Comforting Classic
- Peanut Butter Kiss Cookies – Soft, Sweet, and Perfect for Sharing
Wrapping Up
Old-fashioned chocolate pie is the kind of dessert that earns a permanent place in your recipe box. It’s simple, honest, and consistently impressive. Once you’ve made it, you’ll see how manageable custard pies can be—and how rewarding.
Keep it classic with whipped cream, or try a twist that fits your style. Either way, you’re in for smooth slices of pure comfort.
Old Fashioned Chocolate Pie - A Silky, Comforting Classic
Ingredients
- 1 fully baked 9-inch pie crust (homemade or store-bought), cooled
- 1 cup granulated sugar
- 1/3 cup unsweetened cocoa powder (natural or Dutch-process)
- 1/4 cup cornstarch (or 1/3 cup all-purpose flour as a substitute)
- 1/4 teaspoon fine salt
- 3 large egg yolks, room temperature
- 2 3/4 cups whole milk (2% works, but whole gives the creamiest texture)
- 3 ounces semisweet or dark chocolate, finely chopped
- 2 tablespoons unsalted butter
- 1 1/2 teaspoons vanilla extract
- Lightly sweetened whipped cream, for topping
- Chocolate shavings or cocoa powder, optional garnish
Instructions
- Blind bake the crust: If you haven’t already, bake your pie crust until golden and fully set. Let it cool completely so the filling doesn’t steam it soggy.
- Whisk the dry ingredients: In a medium saucepan off the heat, whisk together sugar, cocoa powder, cornstarch, and salt until no cocoa lumps remain.
- Temper with milk: Gradually whisk in about 1/2 cup milk to make a smooth paste. Then slowly add the rest of the milk, whisking constantly so it’s lump-free.
- Cook the custard base: Set the pan over medium heat. Cook, whisking steadily, until the mixture warms and starts to thicken, 5–8 minutes. Don’t rush it; gentle heat prevents scorching.
- Temper the yolks: In a small bowl, whisk the egg yolks. Ladle in a splash of the hot mixture while whisking the yolks, then another splash. Pour the warmed yolks back into the pan, whisking all the while.
- Thicken to pudding stage: Continue cooking over medium heat, whisking, until the custard is glossy and thick enough to coat the back of a spoon, 2–4 minutes. Small bubbles will plop up; that’s your cue it’s ready.
- Add chocolate and butter: Remove from heat. Immediately add the chopped chocolate, butter, and vanilla. Whisk until completely smooth and shiny.
- Strain for silkiness: For the smoothest texture, pour the custard through a fine-mesh sieve into a bowl. This catches any tiny lumps or bits of cooked egg.
- Fill the crust: Scrape the warm filling into the cooled crust. Smooth the top with a spatula so it sets evenly.
- Prevent a skin: Press a piece of plastic wrap directly onto the surface of the filling. This keeps the top from forming a rubbery layer.
- Chill until set: Refrigerate at least 4 hours, or overnight for the cleanest slices.
- Finish and serve: Peel off the plastic. Top with soft peaks of whipped cream and a dusting of cocoa or chocolate shavings. Slice with a warm, clean knife for neat wedges.
Printable Recipe Card
Want just the essential recipe details without scrolling through the article? Get our printable recipe card with just the ingredients and instructions.