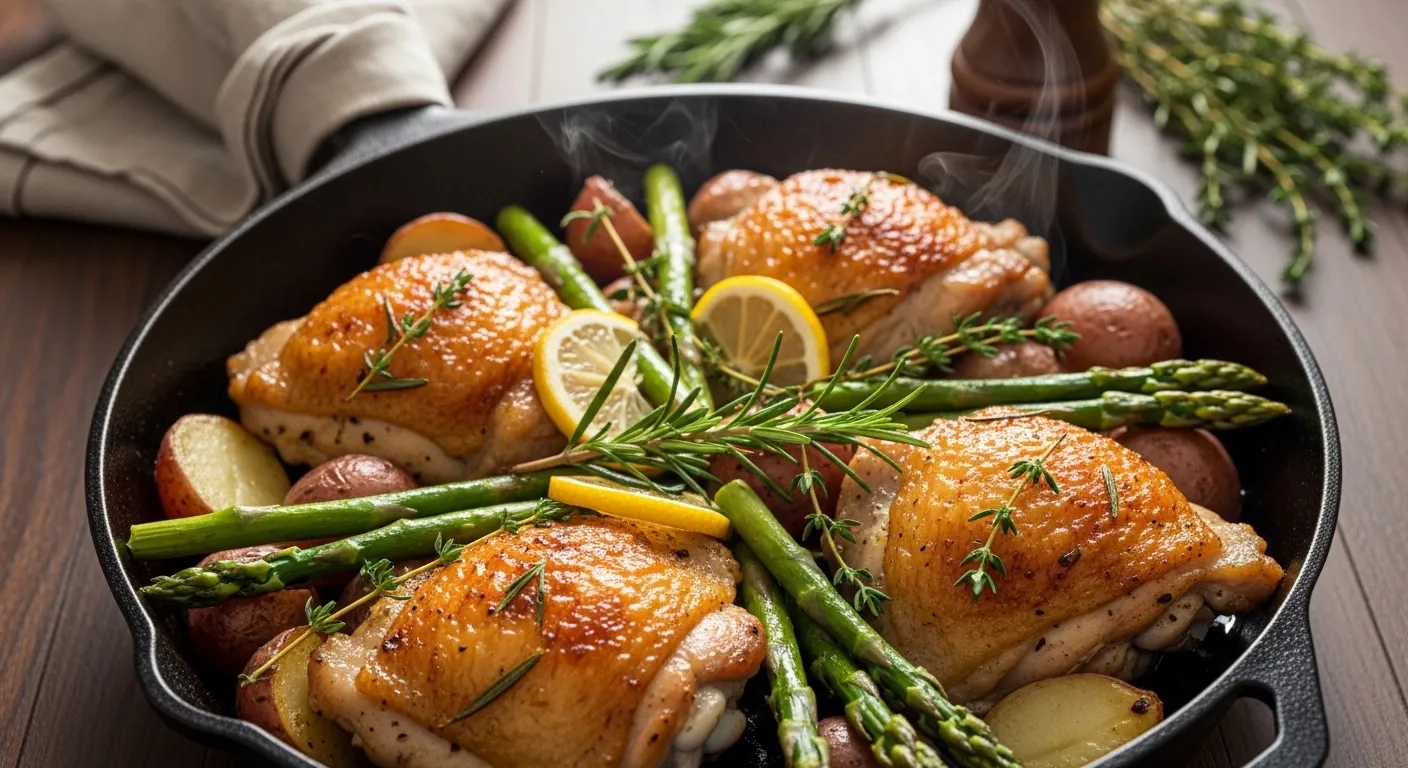
Crispy Skillet Chicken Thighs Ultimate Comfort Food
So, you’ve got a pack of chicken thighs and a hunger that could rival a grizzly bear waking up from hibernation, but you really don’t want to spend three hours standing over a stove. I totally get it. Life is too short to scrub twelve different pans for one meal. You want that golden, crispy skin that shatters when you bite into it, and meat so juicy it feels like a literal hug for your soul. Well, grab your favorite skillet—and maybe a glass of wine—because we are about to make some magic happen in about thirty minutes.
Why This Recipe is Awesome
Let’s be real for a second: chicken breasts are the overachieving, dry cousins of the poultry world. They’re fine, I guess, if you like chewing on cardboard. But chicken thighs? That’s where the party is. This recipe is awesome because it’s basically foolproof. Seriously, even if your previous culinary peak was successfully boiling water without setting off the smoke alarm, you can do this.
It’s a one-pan wonder, which means minimal cleanup (hallelujah!). Plus, it’s incredibly versatile. Want to serve it with fancy roasted veggies? Go for it. Want to eat it over a sink at 11:00 PM because you’re a grown adult and nobody can stop you? Also a valid choice. The skin gets so crispy it’s basically a snack in its own right, and the meat stays tender because thighs are forgiving like a best friend who ignores your “I’ll be there in five minutes” text when you’re actually still in the shower.
Ingredients You’ll Need
Don’t worry, you won’t need to go on a quest for rare Himalayan salt or some herb that only grows on the dark side of the moon. This is straightforward stuff.
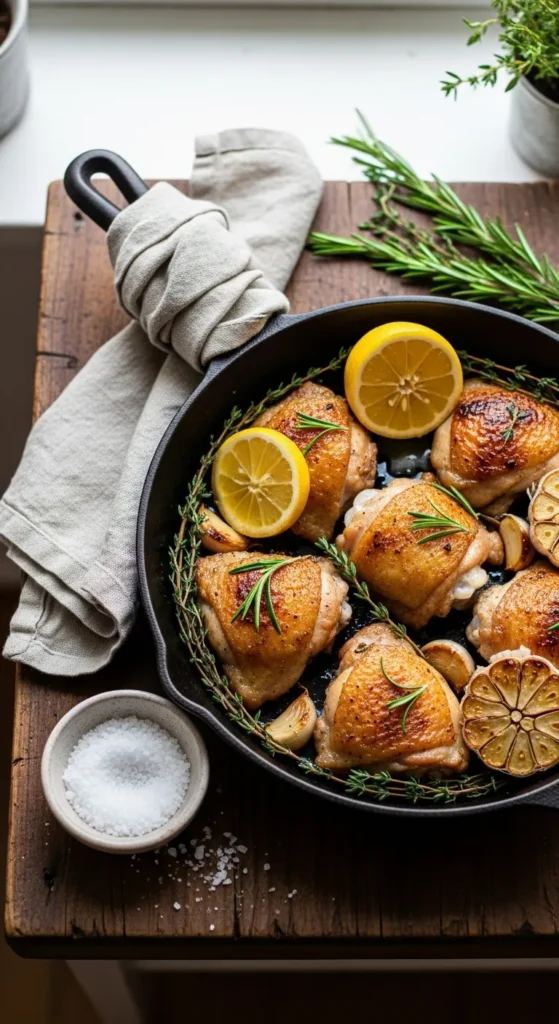
- 6-8 Bone-in, Skin-on Chicken Thighs: Don’t even think about going boneless or skinless here. We need that fat and bone for flavor, FYI.
- 1 tablespoon Olive Oil: Just enough to get the party started.
- 1 teaspoon Garlic Powder: Because peeling fresh garlic when you’re hangry is a test of patience none of us need.
- 1 teaspoon Onion Powder: It adds that “what is that delicious secret ingredient?” vibe.
- 1 teaspoon Smoked Paprika: For that gorgeous color and a hint of “I cooked this over a campfire” (even if you didn’t).
- ½ teaspoon Dried Thyme or Oregano: Dealer’s choice. Whatever is hiding in the back of your spice cabinet is fine.
- Salt and Black Pepper: Be generous. Don’t be that person who under-seasons.
- 2 tablespoons Butter: Because butter makes everything better, IMO.
- Fresh Parsley (Optional): Just to make it look like you actually tried when you post the photo on Instagram.
Step-by-Step Instructions
- Dry those thighs. Take some paper towels and pat the chicken skin until it’s bone-dry. If the skin is wet, it won’t get crispy; it’ll just steam and look sad. Nobody wants sad, flabby chicken skin.
- Season like a pro. In a small bowl, mix your garlic powder, onion powder, paprika, herbs, salt, and pepper. Rub that mixture all over the chicken—under the skin, on the bottom, everywhere. Give them a little massage; they’ve had a long day.
- Get the pan hot. Heat the olive oil in a large heavy skillet (cast iron is king here) over medium-high heat. You want it shimmering, not smoking like a 1950s detective.
- Skin-side down. Place the thighs skin-side down in the hot skillet. Do not crowd the pan. If you have to cook them in two batches, do it. If they’re too close, they’ll just gossip and steam instead of browning.
- The waiting game. Let them cook undisturbed for about 10–12 minutes. Don’t poke them. Don’t prod them. Let that skin develop a deep, golden-brown crust. If you try to flip them and they stick, they aren’t ready to let go yet.
- Flip it over. Once the skin is crispy and releases easily from the pan, flip the thighs. Cook for another 8–10 minutes.
- Butter basting. Drop the butter into the pan during the last 2 minutes of cooking. Once it melts, spoon that liquid gold over the chicken. It adds a nutty richness that is honestly life-changing.
- Check the temp. Use a meat thermometer to make sure the internal temperature hits 165°F. Once they’re done, move them to a plate and let them rest for 5 minutes. This keeps the juices inside the meat instead of all over your plate.
Common Mistakes to Avoid
- Using a cold pan. If you put the chicken in a cold skillet, the fat won’t render properly and you’ll end up with greasy, soggy skin. Wait for the sizzle.
- Flipping too early. I know you’re curious, but leave it alone! Constant flipping prevents that crust from forming. Trust the process.
- Crowding the skillet. If the thighs are touching, the moisture can’t escape. Give them some personal space; they aren’t on a crowded subway.
- Ignoring the rest period. If you cut into that chicken the second it leaves the pan, all the juice will run away. You’ve worked hard; don’t ruin it now by being impatient.
Alternatives & Substitutions
Don’t have smoked paprika? Regular paprika works, though you’ll miss that hint of woodsmoke. If you’re out of olive oil, avocado oil or even Ghee is a great swap because they handle high heat well.
If you’re feeling a little “extra,” you can toss some halved Brussels sprouts or baby potatoes into the pan juices while the chicken rests. They’ll soak up all that schmaltz (chicken fat) and taste better than anything you’ve ever had. Personally, I think adding a squeeze of fresh lemon at the very end brightens the whole dish, but if you’re a “meat and potatoes only” kind of person, feel free to ignore me.
FAQ.s
Can I use chicken breasts instead?
Technically, yes, but why would you want to live that way? If you must, shorten the cooking time significantly so you don’t end up with an edible hockey puck. Breasts lack the fat needed to stay juicy during this kind of high-heat searing.
Does the skillet have to be cast iron?
It doesn’t have to be, but cast iron holds heat much better than thin stainless steel. It’s the difference between a nice tan and a deep, golden glow. If you use non-stick, just be careful not to crank the heat too high, or you’ll ruin the coating.
Should I leave the bone in?
Absolutely. The bone helps the meat cook more evenly and adds a ton of flavor. Plus, there’s something oddly satisfying about gnawing on a chicken bone like a medieval king. No? Just me? Moving on.
Can I do this with frozen chicken?
Only if you enjoy disappointment. Thaw the chicken completely in the fridge before you start. Cooking from frozen will result in a burnt outside and a raw, icy center. Not exactly the “comfort food” vibe we’re going for.
What if I don’t have a meat thermometer?
You can prick the thickest part of the thigh with a knife; if the juices run clear, you’re usually good to go. But honestly, buy a thermometer. They’re cheap and they save you from the “is this pink or is it just the lighting?” anxiety.
How do I store leftovers?
If you actually have leftovers (unlikely), keep them in an airtight container in the fridge for up to 3 days. To reheat, use an oven or air fryer to keep the skin crispy. The microwave is where crispy skin goes to die.
Final Thoughts
There you have it! You are now the proud maker of the world’s best skillet chicken thighs. It wasn’t that hard, right? You’ve got protein, you’ve got flavor, and you’ve got a skillet that smells like heaven.
This recipe is proof that you don’t need a culinary degree or a pantry full of expensive “superfoods” to make a meal that tastes like a million bucks. It’s simple, honest, and incredibly satisfying. Now go impress someone—or yourself—with your new culinary skills. You’ve earned it! (And seriously, don’t forget to let the meat rest.) Happy eating!
Related Recipes
- Breathtaking Peruvian Chicken with Famous Green Sauce
- Honey Butter Garlic Chicken Recipe
- Ultimate Chicken Spaghetti: The Dreamiest Comfort Meal
Printable Recipe Card
Want just the essential recipe details without scrolling through the article? Get our printable recipe card with just the ingredients and instructions.